D Skelton

-
Mentor
Arms
Last week I did a job for forum member joramtor. Link to the original post here: http://www.electriciansforums.co.uk...s-your-area/87967-repair-micc-pyro-cable.html

He had an underground mineral cable that had been severed by the groundworkers so off we went to sort it out for him. The length of cable that was broken was about 50m long and ran between two lamp posts in his driveway. I thought I might put up some photos of the work along with an explanation so that those less experienced with mineral might learn something. Feel free to add to it if you want (I'm sure much flaw picking and critisism will ensue also :D).

First off the customer snipped a piece off and posted it to me so that I could determine whether it was imperial or metric and also so that I could size the pots and glands needed if it was imperial (the job was over an hour away so couldn't just pop round). Upon receiving it it was immediately apparent that it was imperial so I used my calipers to size the pots and glands needed. The pots needed were 2L2.5, the glands needed were 4L1.5 and the seals needed were 4L1. The cable in question was 4 core with the conductors being equivalent to 0.75mm-1mm.

When I arrived at the job this is what I found, it had been lying here like this, exposed, for about four months:
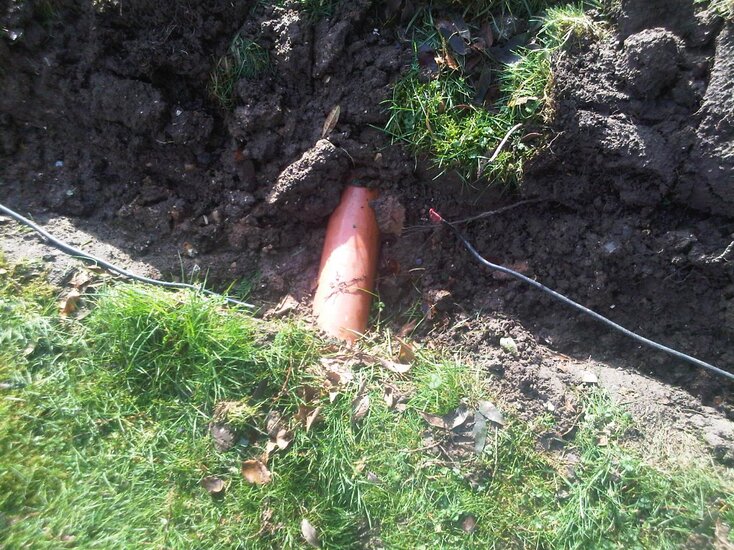
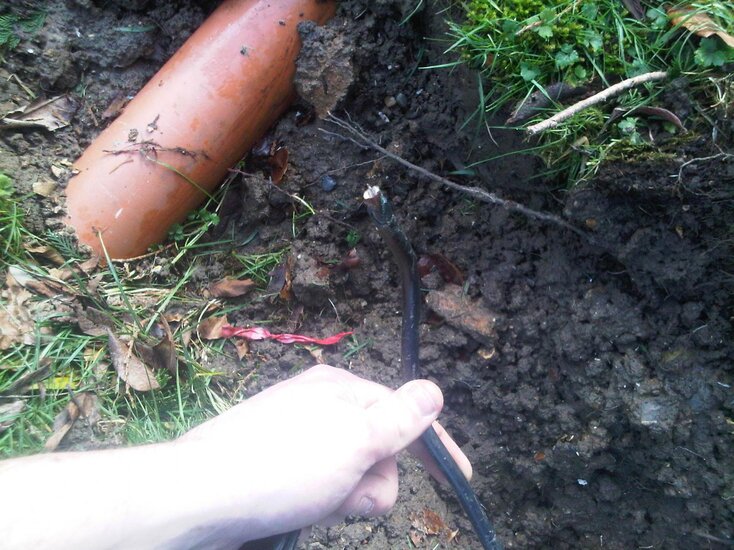
1.jpg2.jpg


First thing's first, isolate and lock off (circuit was already off at the breaker). Then to start... I chopped the ends away with an angle grinder for a neat and square application of the stripper (a square end always makes starting off the stripper easier) and stripped back a good three quaters of a meter of the sheath with a ring and pull. Next thing to do is to get the blowtorch out and give the cable a good blasting. Short, slow even strokes towards the cut end of the cable from about 650mm back to get rid of any moisture ingress. Remember the magnesium oxide that makes up the insulating mineral compound is hygroscopic, it wicks up moisture like nobody's business! So we have to get that out.
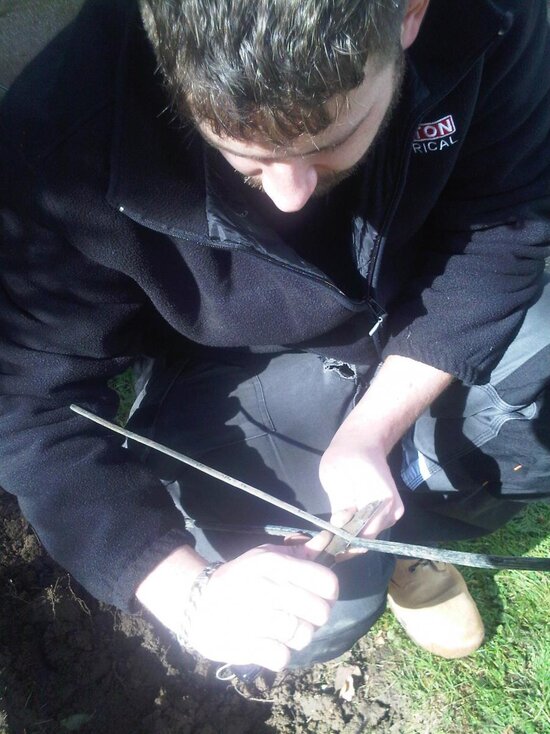
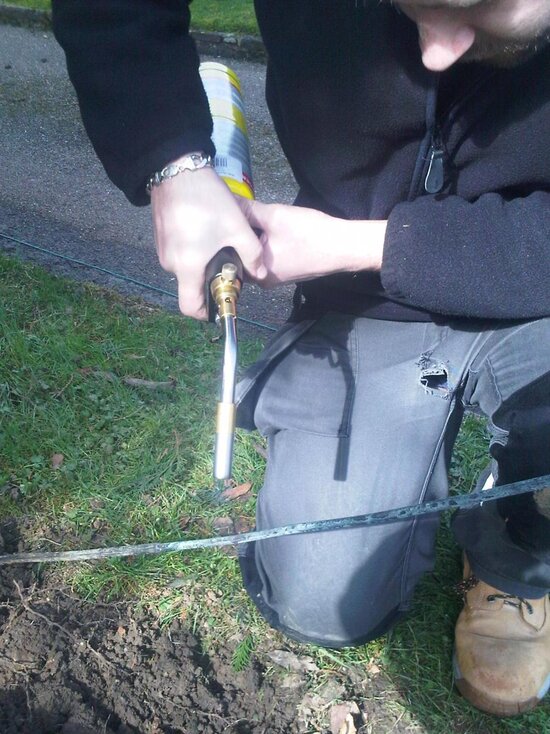
3.jpg4.jpg


After ten or so minutes of doing this I let the cable cool and after it was, I slid on the glands and then started stripping it back with the joistripper. This was tougher than usual as the cable was very slightly too fat to fit in the 2L2.5 hole and a bit loose in the 4L1.5 hole. I went through two blades with this bit! In hindsight I should really have used a heavy duty stripper but hey ho. When the cables were stripped back the pots were screwed on and potting compound was applied from one side only to eliminate air pockets within the pot. Notice the caps are half slid down, this helps to keep the conductors in place through the potting compound filling process. The caps were then put in place and crimped using a mineral crimping tool.
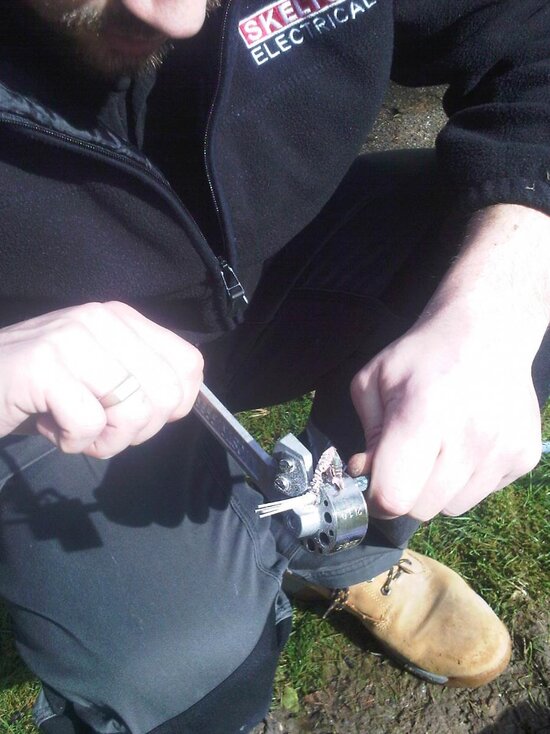
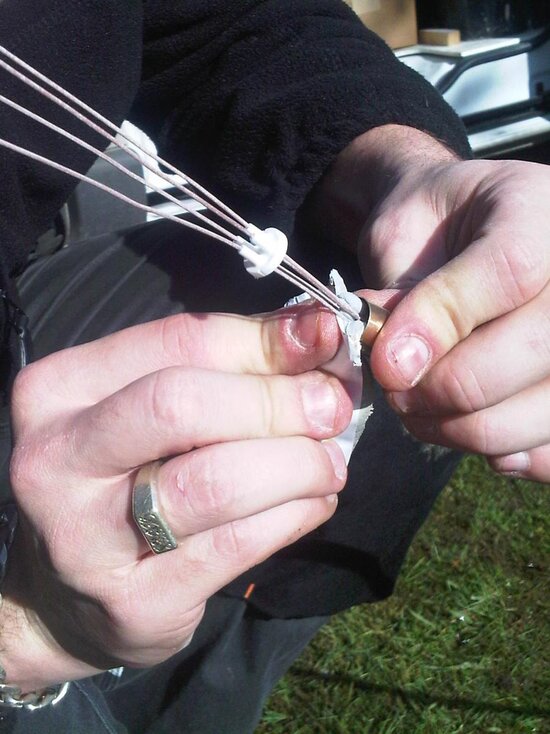
5.jpg6.jpg


When this was done it was time to IR the conductors and copper sheath. The lowest result was roughly 20Mohms live-live. Not perfect but okay. After this I belled out the ends between the break and each lamp post with my long lead to determine which core was which and also to check earth continuity on the sheath which was being used as the cpc. Once this was done the insulation was applied and the cables identified. Two cores were not used and were disconnected at the lamp posts. At the supply end I ensured that these were earthed as they previously weren't.
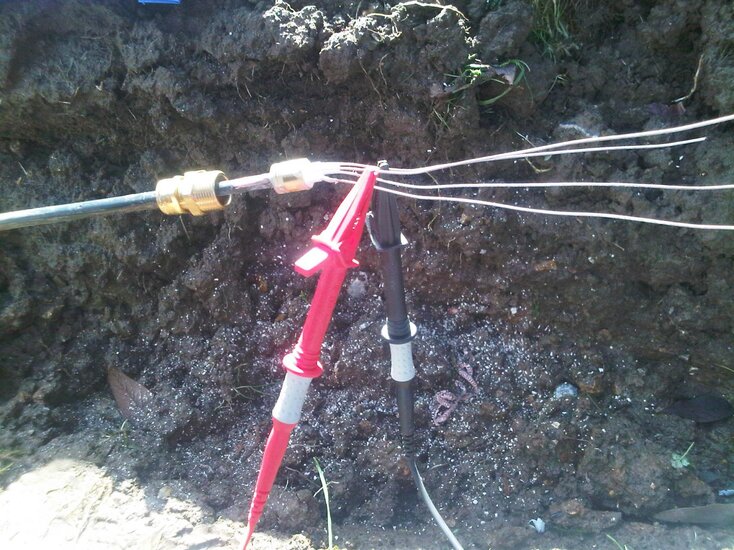
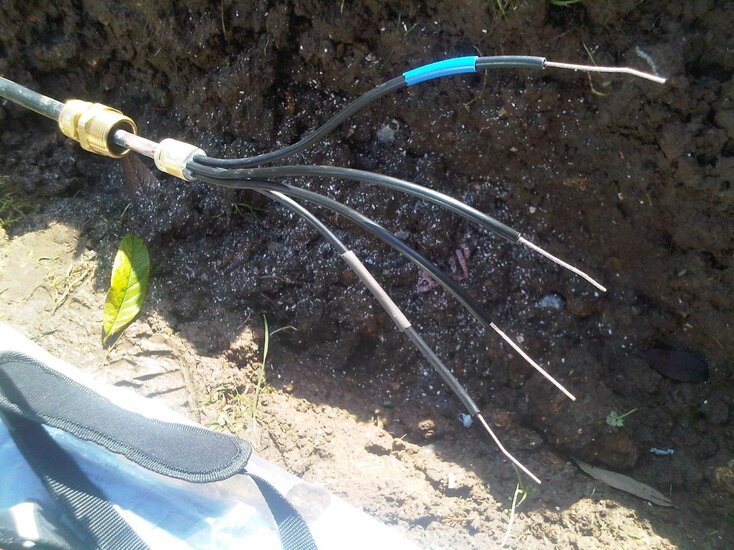
7.jpg8.jpg


Once this was done I terminated the gland at one of two Pratley underground junction boxes making sure to clean the copper on the exposed mineral sheath to ensure zero resistance between this and the olive within the compression gland. I then prepared a short length of 4 core 1mm SWA to bridge the gap and terminated this into the other side of the Pratley.
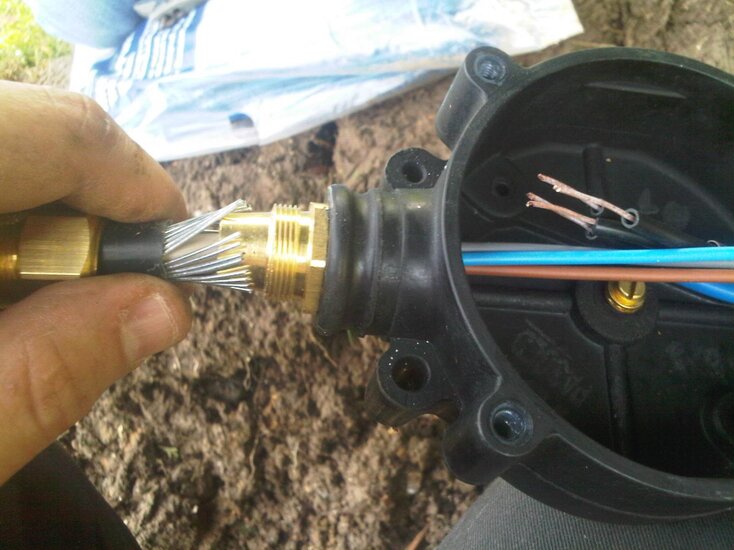
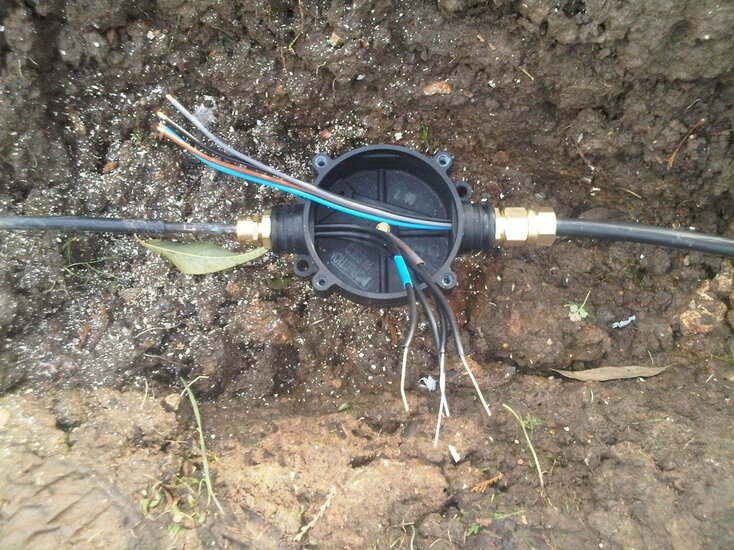
9.jpg10.jpg


This process was then repeated on the second Prately on the other end of mineral cable so that the short length of SWA was the bridge in the gap of the break. Once this was done it was time to seal the gland terminations. I tightly wrapped some insulation tape at the join between the glands and the cable to ease the transition and then wrapped tightly and carefully with a couple of layers of self amalgamating tape. This will seal the joins and prevent corrosion of any previously exposed metal.
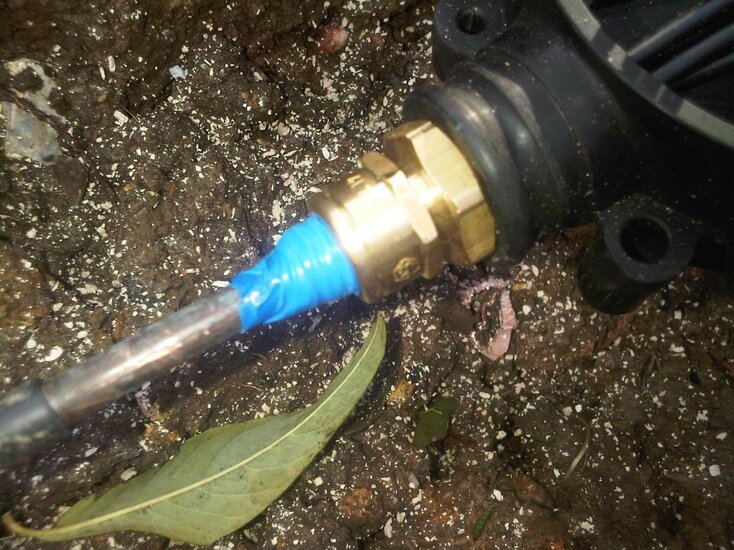
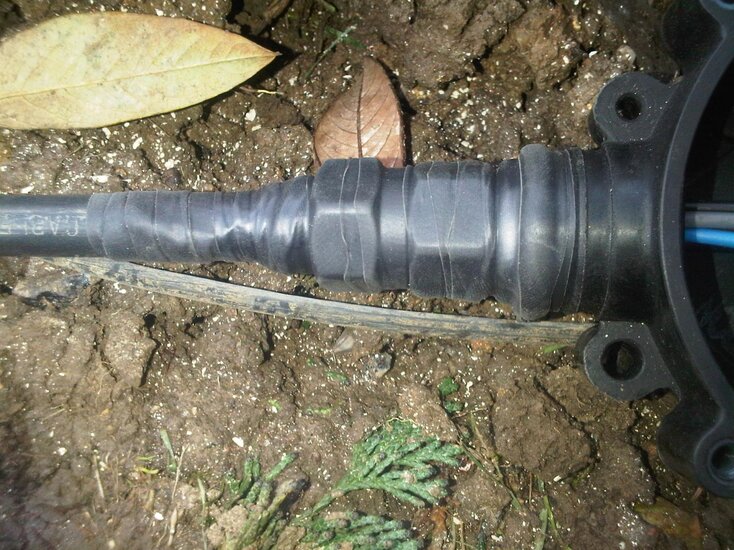
11.jpg12.jpg


Once sealed up the cables were joined with wagos and the circuit tested, dead tests then live. Total lowest IR had now reduced to 15Mohms (a product of the increase in length [2x25m = 50m]), again, not perfect but okay. Pratleys have a built in method of preserving cpc continuity so no need for fly leads. All tested out ok so MCB on and a functional test of the circuit carried out. All ok. MCB off, JBs sealed up with the lids and put in place, circuit energised and away we go!
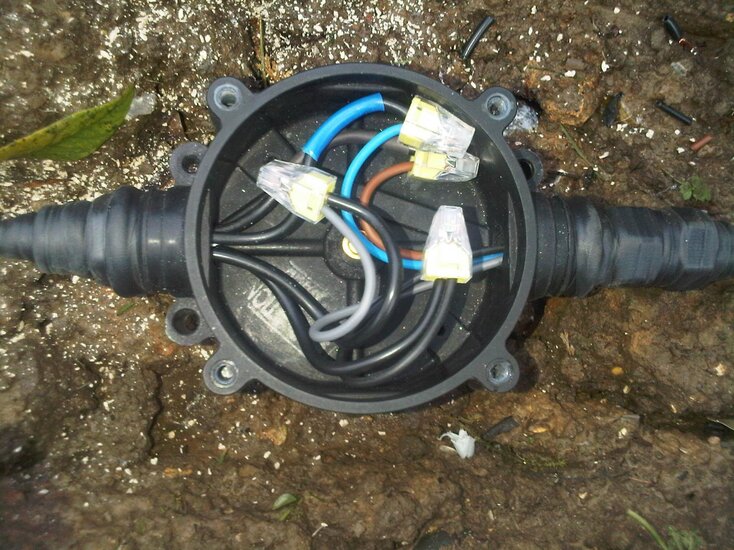
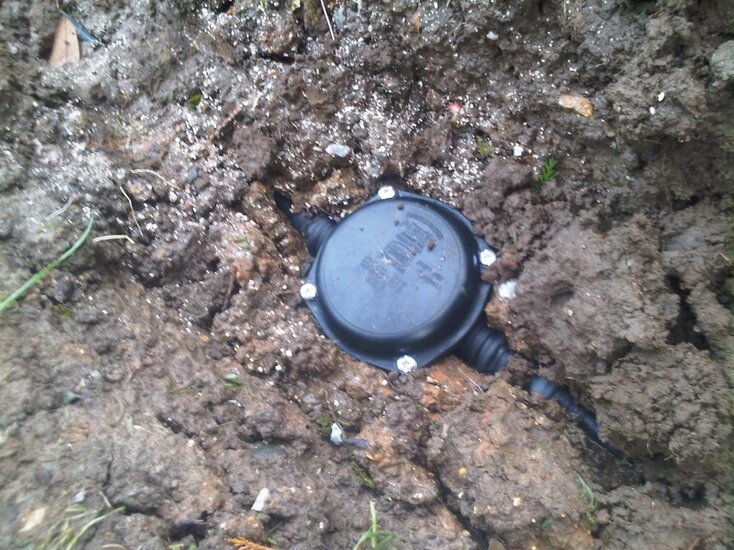
13.jpg14.jpg


The customer was told by more than one person that it couldn't be done, and here it is! Never say never! :)
 
No idea , I do remember Pyrotenax's heatshrink pot/ seals but never used them.

I keep a few of the heatshrink seals for emergency, 1 size fits most, type repairs.

I got one of the wedge pot tools in a box of second hand tools a few years ago but have never used it or even found new wedge pots.
 
I keep a few of the heatshrink seals for emergency, 1 size fits most, type repairs.

I got one of the wedge pot tools in a box of second hand tools a few years ago but have never used it or even found new wedge pots.
Can you still buy them, struggled to find them got a pic to show other members if they haven't seen them before.
 

Attachments

  • jpeg micc.jpeg
    jpeg micc.jpeg
    41 KB · Views: 66
Can you still buy them, struggled to find them got a pic to show other members if they haven't seen them before.

They aren't manufactured anymore.
I keep an eye out for new old stock appearing on ebay.

I've collected a stock of cable and fittings from various people clearing out their stores.
 
Good, this clamp makes the earth connection to the copper cable and the circuit must not be energised without it fitted.


I can't make out the 3rd core for either of them.
Has anyone said what that thrid core is being used for?


It is very hard to make a repair if it is snapped off at the pot, but not always impossible.

Cutting back 2 feet is unnecessary, it will only need to be cut back enough to expose enough of the snapped off core to be able to join onto it.
Has anyone carried out any testing yet to see if the cable is in useable condition or not?


The only real risk is that the cable may have corroded due to chemicals in the plaster. But it looks like it is plastic coated MICC which has just had the last inch or two removed, you can see the orange outer sheath on one of them.
The sheath will have protected the buried cable from corrosion.
Hey Dave. Trying to attach further photo
They look like wedge pots rather than the usual screw on pots, were they ever used on metric cable or were they older than that?
hi dave struggling to get low resolution images attached due to size. Defo 3 core each cable physically counted hopefully attached will show. Please see right cable. If you zoom in you can see ehats left of small cable. Electrician that came around said that if was to reterminate then the cables may be brittle in which case may not be able to reterminate at all in which case it defo would mean rewiring. At the moment he says the cable that broke is not live but is the common core that goes to next light in the loop. It connects to light switch and feeds of the live that is already there. He says best bet is to run a new twin and earth from the circuit breaker to the light that isn’t working but that would mean conduit across ceiling as in these flats the ceiling is concrete. I really would like to reterminate the pyro but worried about it being brittle as he says and making it worse
771CDFA6-1246-4D10-AAB4-3567133D2240.jpeg
 
Last edited by a moderator:
They look like wedge pots rather than the usual screw on pots, were they ever used on metric cable or were they older than that?
Dave please see pictures
 

Attachments

  • 3E7315FC-C8B1-471D-9F67-C1B2577749F5.jpeg
    3E7315FC-C8B1-471D-9F67-C1B2577749F5.jpeg
    42.1 KB · Views: 58
  • C8099267-C94F-4CCA-9FE8-D05F30D201FC.jpeg
    C8099267-C94F-4CCA-9FE8-D05F30D201FC.jpeg
    15.3 KB · Views: 55
  • 01F3505B-AC23-4B5C-9622-751AFB5BF4ED.jpeg
    01F3505B-AC23-4B5C-9622-751AFB5BF4ED.jpeg
    52.4 KB · Views: 53
  • 5DE1538C-B905-41CC-A086-FA7AF948CD97.jpeg
    5DE1538C-B905-41CC-A086-FA7AF948CD97.jpeg
    55.6 KB · Views: 54
  • FD4D1D4A-5B97-4E00-BD0F-9DD05E032B35.jpeg
    FD4D1D4A-5B97-4E00-BD0F-9DD05E032B35.jpeg
    40.7 KB · Views: 50
  • 90C11E01-EC52-4516-8227-6FF942534898.jpeg
    90C11E01-EC52-4516-8227-6FF942534898.jpeg
    37.9 KB · Views: 50
  • F3F771FD-B64F-490B-9D24-1902C522A566.jpeg
    F3F771FD-B64F-490B-9D24-1902C522A566.jpeg
    47.8 KB · Views: 69
  • 21080E24-C426-4520-97B1-077F7CD60940.jpeg
    21080E24-C426-4520-97B1-077F7CD60940.jpeg
    36.7 KB · Views: 46
  • F9003C62-85A8-41E3-B62C-B5911B0D77A2.jpeg
    F9003C62-85A8-41E3-B62C-B5911B0D77A2.jpeg
    46.9 KB · Views: 54
  • BE8F20B5-7F0A-4A96-A586-A21396E1BEBA.jpeg
    BE8F20B5-7F0A-4A96-A586-A21396E1BEBA.jpeg
    45.8 KB · Views: 51
  • 4205C164-F93A-4F84-9C88-2A410FC479C9.jpeg
    4205C164-F93A-4F84-9C88-2A410FC479C9.jpeg
    52.3 KB · Views: 62
For the photos, what I do when I take a photo with my phone is to screenshot it, then crop the screenshot down to just the original photo.
On my iPhone, that brings the image size just low enough for the forum to accept.

Do you have a photo looking up into the seal side of the pot, showing where the core is broken?

I still think you might get enough of a stump of copper for a very small connector to fit on…. Even the Ideal push fit type, rather than a block connector.
Thanks. That works. Please see. Just see the stump
BAC06851-B146-4AEC-91F9-D21C44BC5E49.jpeg
 
Last edited by a moderator:
For the photos, what I do when I take a photo with my phone is to screenshot it, then crop the screenshot down to just the original photo.
On my iPhone, that brings the image size just low enough for the forum to accept.

Do you have a photo looking up into the seal side of the pot, showing where the core is broken?

I still think you might get enough of a stump of copper for a very small connector to fit on…. Even the Ideal push fit type, rather than a block connector.
Can you recommend a connector? I’ll try it myself I think. Many thanks
 
Defo 3 core each cable physically counted hopefully attached will show. Please see right cable. If you zoom in you can see ehats left of small cable.

Yes I can see it now, that is definately a challenge to repair but I see no reason why it would not be possible to repair that with relatively little further damage to the wall.
Electrician that came around said that if was to reterminate then the cables may be brittle in which case may not be able to reterminate at all in which case it defo would mean rewiring.

I very much doubt that the cable has become brittle, without outside influences causing it copper doesn't just degrade and become brittle.
At the moment he says the cable that broke is not live but is the common core that goes to next light in the loop.
OK, that makes a bit more sense now.


I think you have 2 possible options here.

1 repair the existing cable

2 repurpose the switched live (marked yellow) as a permanent live and then fit a wireless switch with a reviver at the light to replace the switched live. The wireless switch may have to go on a surface box mounted over the existing switch position.
 
If there isn't enough cable to repair, take the switch up 6 inches, new box with knockouts, or as existing with earth clamps fitted, strip back and re terminate.
Need a decent, experienced spark, though.
High switch, but what's the cost?
 
If there isn't enough cable to repair, take the switch up 6 inches, new box with knockouts, or as existing with earth clamps fitted, strip back and re terminate.
Need a decent, experienced spark, though.
High switch, but what's the cost?
With Gland couplers and bush would make it a tad lower
 
Yes I can see it now, that is definately a challenge to repair but I see no reason why it would not be possible to repair that with relatively little further damage to the wall.


I very much doubt that the cable has become brittle, without outside influences causing it copper doesn't just degrade and become brittle.

OK, that makes a bit more sense now.


I think you have 2 possible options here.

1 repair the existing cable

2 repurpose the switched live (marked yellow) as a permanent live and then fit a wireless switch with a reviver at the light to replace the switched live. The wireless switch may have to go on a surface box mounted over the existing switch position.
Dave. Can you recommend a wireless switch. If repurposing the yellow cable to permanent live then that would provide power to bathroom and bedroom that is currently in darkness. Is that right? Forgive my naïve Rss but how would the witless switch be powered? And you mean mounting witless switch over the top of normal switch? Is this something an electrician would find challenging or easy? Many thanks. Really appreciate your help on this I truly do
 
If there isn't enough cable to repair, take the switch up 6 inches, new box with knockouts, or as existing with earth clamps fitted, strip back and re terminate.
Need a decent, experienced spark, though.
High switch, but what's the cost?
My issue it seems is getting someone who could do this. It’s totally beyond the electricians I have had around. (So far 3). They have suggested a rewrite and then trunking or lowering ceilings!! I am absolutely dumbstruck that a single core of a cable is broken and I have been told it could abe a rewire running into the thousands. I know I don’t know electrics but I can’t understand why this cannot be fixed. Are any of you guys available to fix this please. Or recommend someone who can? Last electrician came around and I used all your comments and he went quiet. I feel he expected me just to accept a rewire. Thanks everyone. You are the light in a dark bathroom and 2nd bedroom!!
 
As is #90 this can be done. Carefully cutting the stub back with a razor blade or very fine file then snap it away and solder, someone who has patience and a deft hand.
 
I know I don’t know electrics but I can’t understand why this cannot be fixed.

This type of cable has fallen out of common use, it can be time consuming to work with and the skills needed to fix it are rarely found within the domestic sector. So most electrician's you find doing domestic work either don't want to work with it, don't know how to work with it or some won't even recognise what it is.

Are any of you guys available to fix this please.

Depends how long you can wait! My other half is in Stevenage so I'm often in the area but I am fully booked now for a few weeks.
 
This type of cable has fallen out of common use, it can be time consuming to work with and the skills needed to fix it are rarely found within the domestic sector. So most electrician's you find doing domestic work either don't want to work with it, don't know how to work with it or some won't even recognise what it is.


Depends how long you can wait! My other half is in Stevenage so I'm often in the area but I am fully booked now for a few weeks.
All the good one are fully booked is the rule. It just says to me that those fully booked are worthwaiting for. Sorry to ask and I am humble asking. How confident are you that you can fix it ?(sorry Dave. Have to ask) hope you don’t mind. Ime in Hitchin by the way
 
If anyone can fix it then @davesparks is someone you should trust to use his skills to do so.
Yes. I truly get that. I suppose I have just been hammered last week or so and just feeling a little lacking in confidence. Not like me at all. I do hope I cause no offence as you guys are the light at the end of this. It would be great if I can get Dave to do this.
 
This type of cable has fallen out of common use, it can be time consuming to work with and the skills needed to fix it are rarely found within the domestic sector. So most electrician's you find doing domestic work either don't want to work with it, don't know how to work with it or some won't even recognise what it is.


Depends how long you can wait! My other half is in Stevenage so I'm often in the area but I am fully booked now for a few weeks.
Happy to wait Dave. I’ll get some lamps in flat. Many thanks
 
This type of cable has fallen out of common use, it can be time consuming to work with and the skills needed to fix it are rarely found within the domestic sector. So most electrician's you find doing domestic work either don't want to work with it, don't know how to work with it or some won't even recognise what it is.


Depends how long you can wait! My other half is in Stevenage so I'm often in the area but I am fully booked now for a few weeks.
Wife had a guy come around and said he would put some trunking up and new cable to the main circuit box as he would not want to channel into concrete as is the ceiling. He wouldn’t touch MICC. He wanted 700 pounds! That sounds a lot for putting up trunking. am so glad I found you guys.

Dave. Believe me I can wait for you and obviously very happy to pay what you need to put this right.

Thanks to all of you. You’ve been a great find.
 
Would it be easier to run trunking from one of the switches that doesn't work to a nearby socket? FCU off the socket, fuse down to 3 or 5A and run the lights off that? Even if there's a cable route through a cupboard or something where you don't need to run trunking at all?

Might be closer than all the way back to board

£700 is an absolute P take
 
Would it be easier to run trunking from one of the switches that doesn't work to a nearby socket? FCU off the socket, fuse down to 3 or 5A and run the lights off that? Even if there's a cable route through a cupboard or something where you don't need to run trunking at all?
If patient, easier to wait for @davesparks to fix it!
£700 is an absolute P take
100% agree.
 
Would it be easier to run trunking from one of the switches that doesn't work to a nearby socket? FCU off the socket, fuse down to 3 or 5A and run the lights off that? Even if there's a cable route through a cupboard or something where you don't need to run trunking at all?

Might be closer than all the way back to board
Knew there'd be a simple way...😉
 
Would it be easier to run trunking from one of the switches that doesn't work to a nearby socket? FCU off the socket, fuse down to 3 or 5A and run the lights off that? Even if there's a cable route through a cupboard or something where you don't need to run trunking at all?

Might be closer than all the way back to board

£700 is an absolute P take
Thanks LS. I love that you guys are thinking on solutions. Very humbling. And thank you so much. If ok I will wait for Dave. Thanks so much
 
Hi everyone. Just to let you know I have had it fixed. Had Jamie and Dan from JJB electrical come by. Two really excellent guys. MICC gurus. Fixed it and made good the bashing of the walls the other electricians had made. I have them logged as two I will call on again. Asked them to quote me for some additional work too. Thanks for all your brilliant advice. Won’t hesitate to pop back if you don’t mind. Best wishes to you all..
 
Hi everyone. Just to let you know I have had it fixed. Had Jamie and Dan from JJB electrical come by. Two really excellent guys. MICC gurus. Fixed it and made good the bashing of the walls the other electricians had made. I have them logged as two I will call on again. Asked them to quote me for some additional work too. Thanks for all your brilliant advice. Won’t hesitate to pop back if you don’t mind. Best wishes to you all..

Nice one. Let's see photos!
 

OFFICIAL SPONSORS

Electrical Goods - Electrical Tools - Brand Names Electrician Courses Green Electrical Goods PCB Way Green 2 Go Pushfit Wire Connectors Electric Underfloor Heating Electrician Courses Heating 2 Go
These Official Forum Sponsors May Provide Discounts to Regular Forum Members - If you would like to sponsor us then CLICK HERE and post a thread with who you are, and we'll send you some stats etc

Advert

Daily, weekly or monthly email

Thread starter

D Skelton

Mentor
Arms
-
Joined
Location
Milton Keynes
If you're a qualified, trainee, or retired electrician - Which country is it that your work will be / is / was aimed at?
United Kingdom
What type of forum member are you?
Heavily Qualified Electrician / Teacher / Tutor - etc

Thread Information

Title
Repairing imperial mineral cable
Prefix
N/A
Forum
UK Electrical Forum
Start date
Last reply date
Replies
112
Unsolved
--

Advert

Thread statistics

Created
D Skelton,
Last reply from
DPG,
Replies
112
Views
17,050

Advert

Back
Top